
BMSearch Login
更新日期:
Since BSM will manage the bookmarks collection based on user which means different users could only see their own bookmarks, I need to design and implement the login mechanism for BSM.
Login mechanism
From my point of view, a completed login mechanism should contains following parts:
Authentication.
Anyone who try to access BSM website needs be validated to identify whether they are qualified users. Only those who have registered themself as BSM’s member can access BSM.
Authorization.
Web resource is only available to the user who has the corresponding permission. If anyone try to access some resource that isn’t available for him, BSM will deny his request even he is a qualified user even he has logged in.
User information and User preference
When user pass the authentication check and authorization check, BSM will show user’s profile and apply his preference for himself.
Route Control
Session timeout
Before we keep going on, I’d like show you how my login page looks like: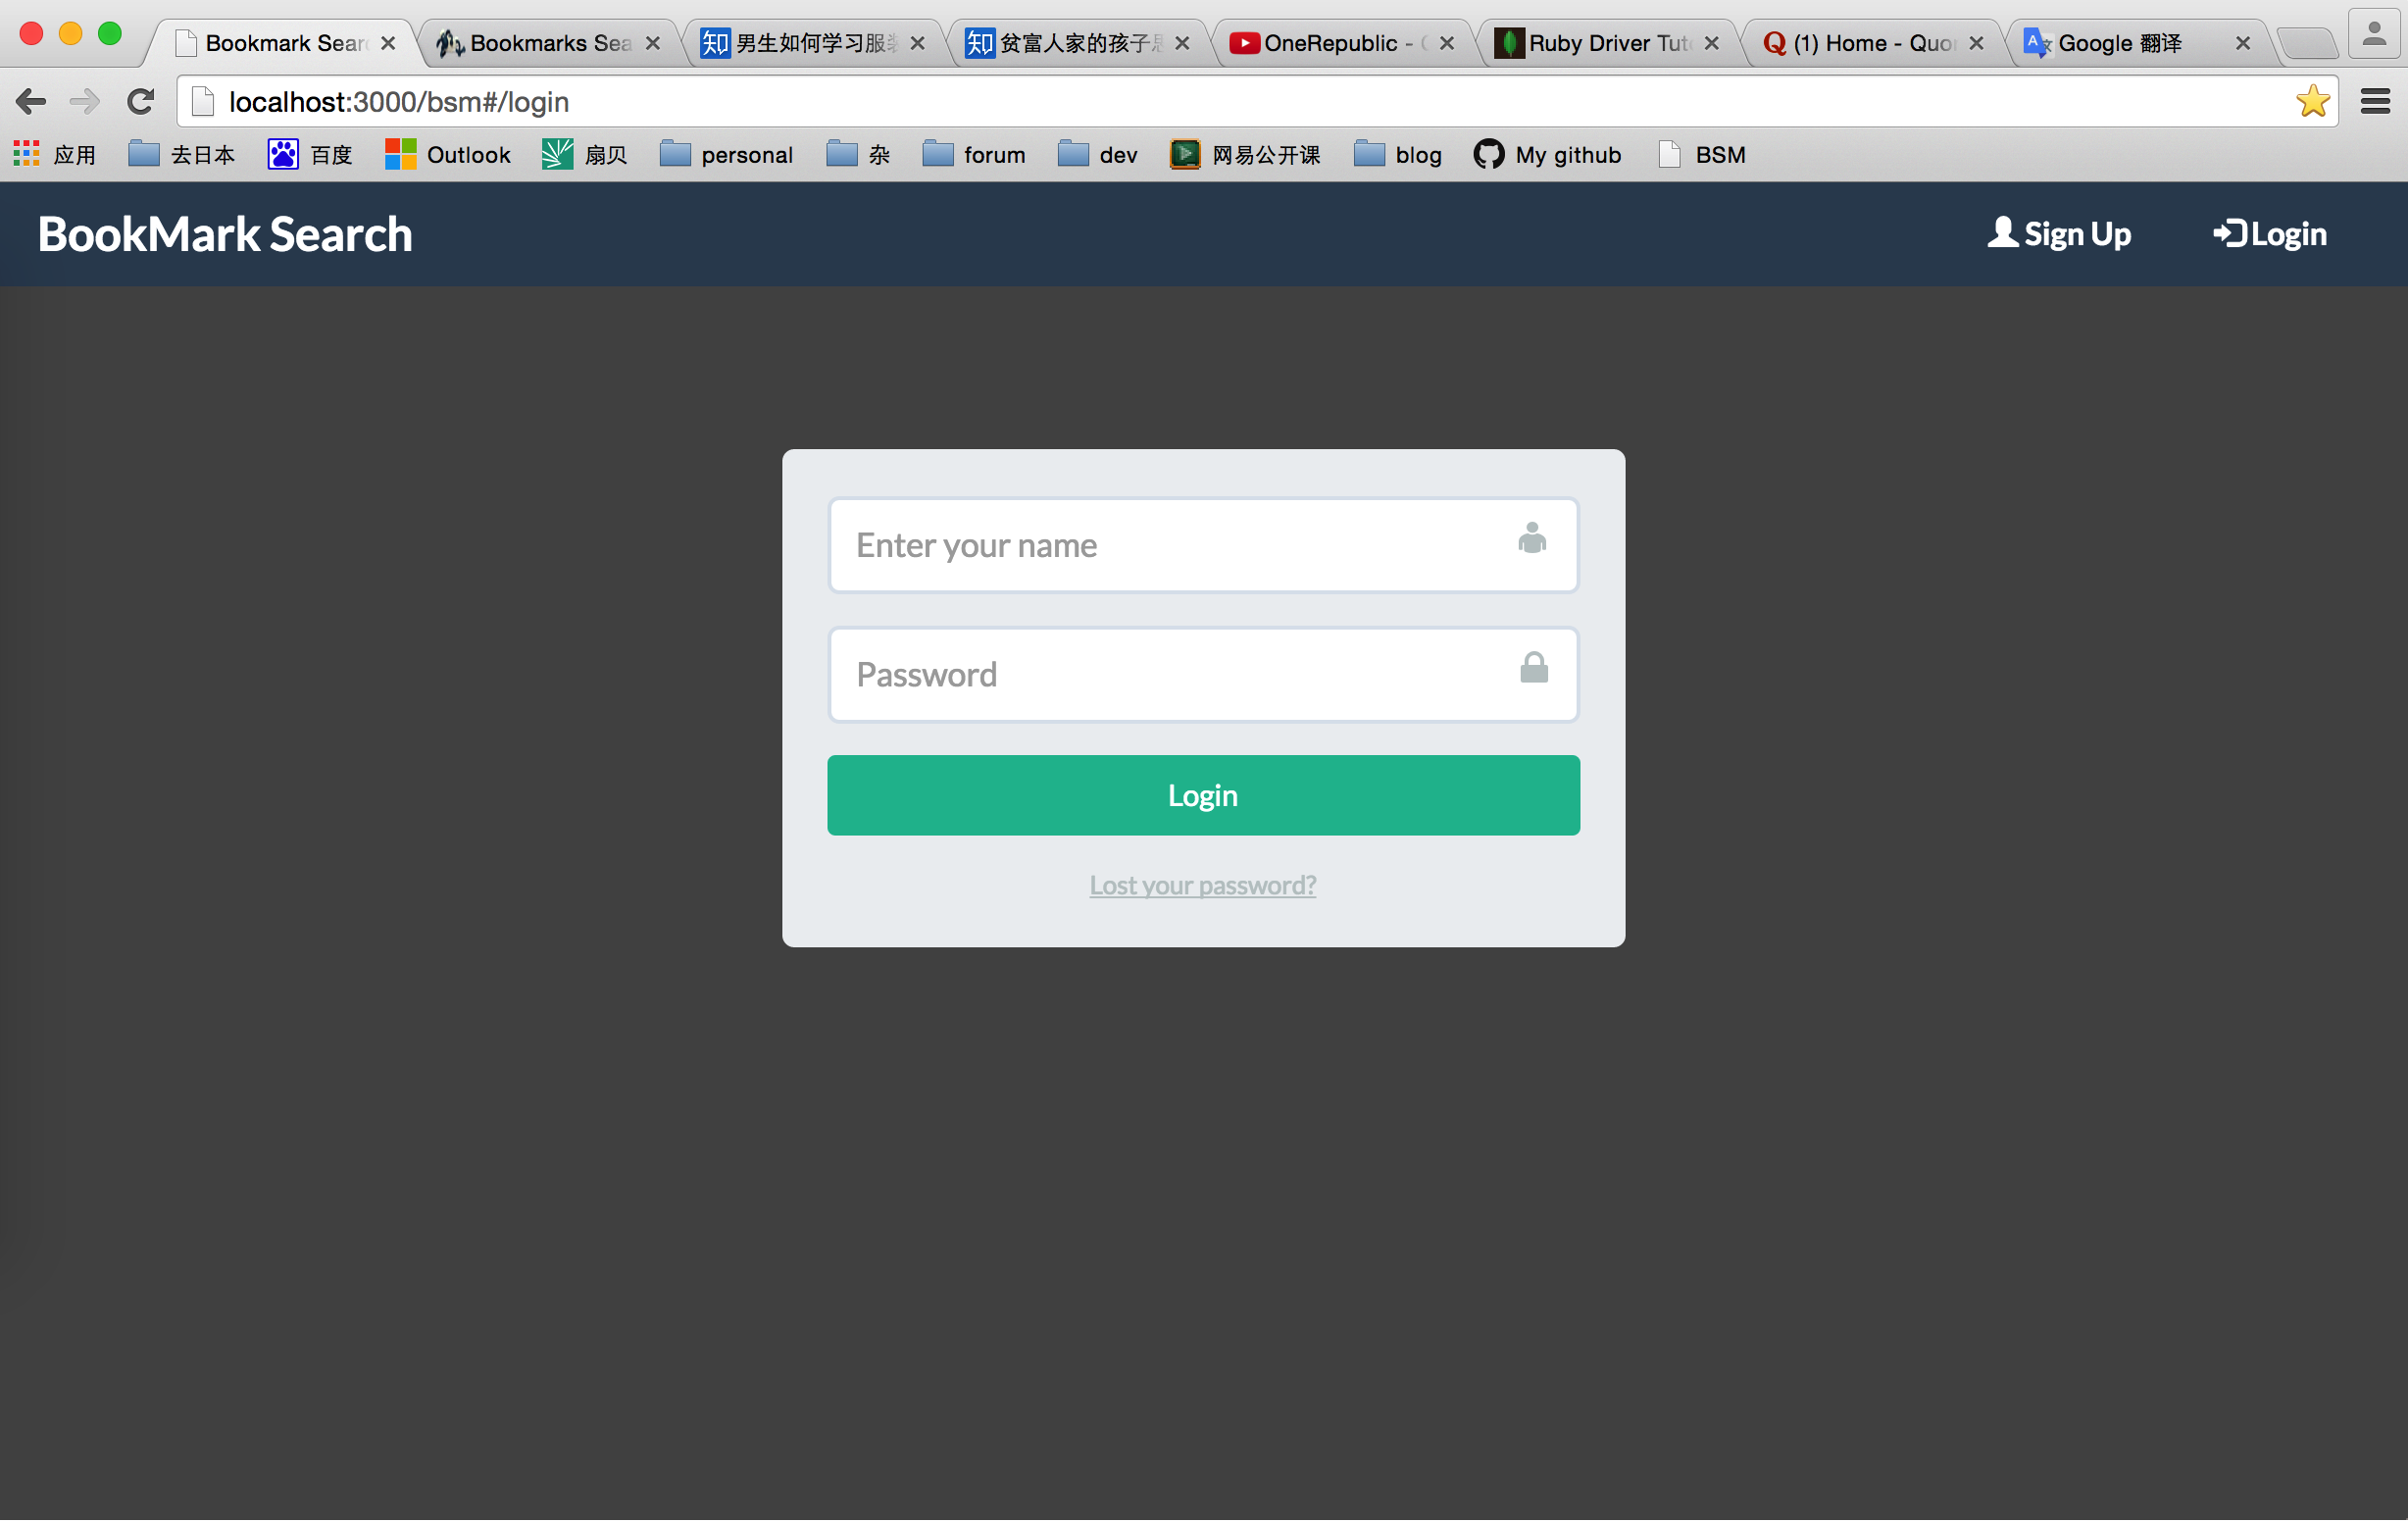
When user passes the validation, then he will see the following page: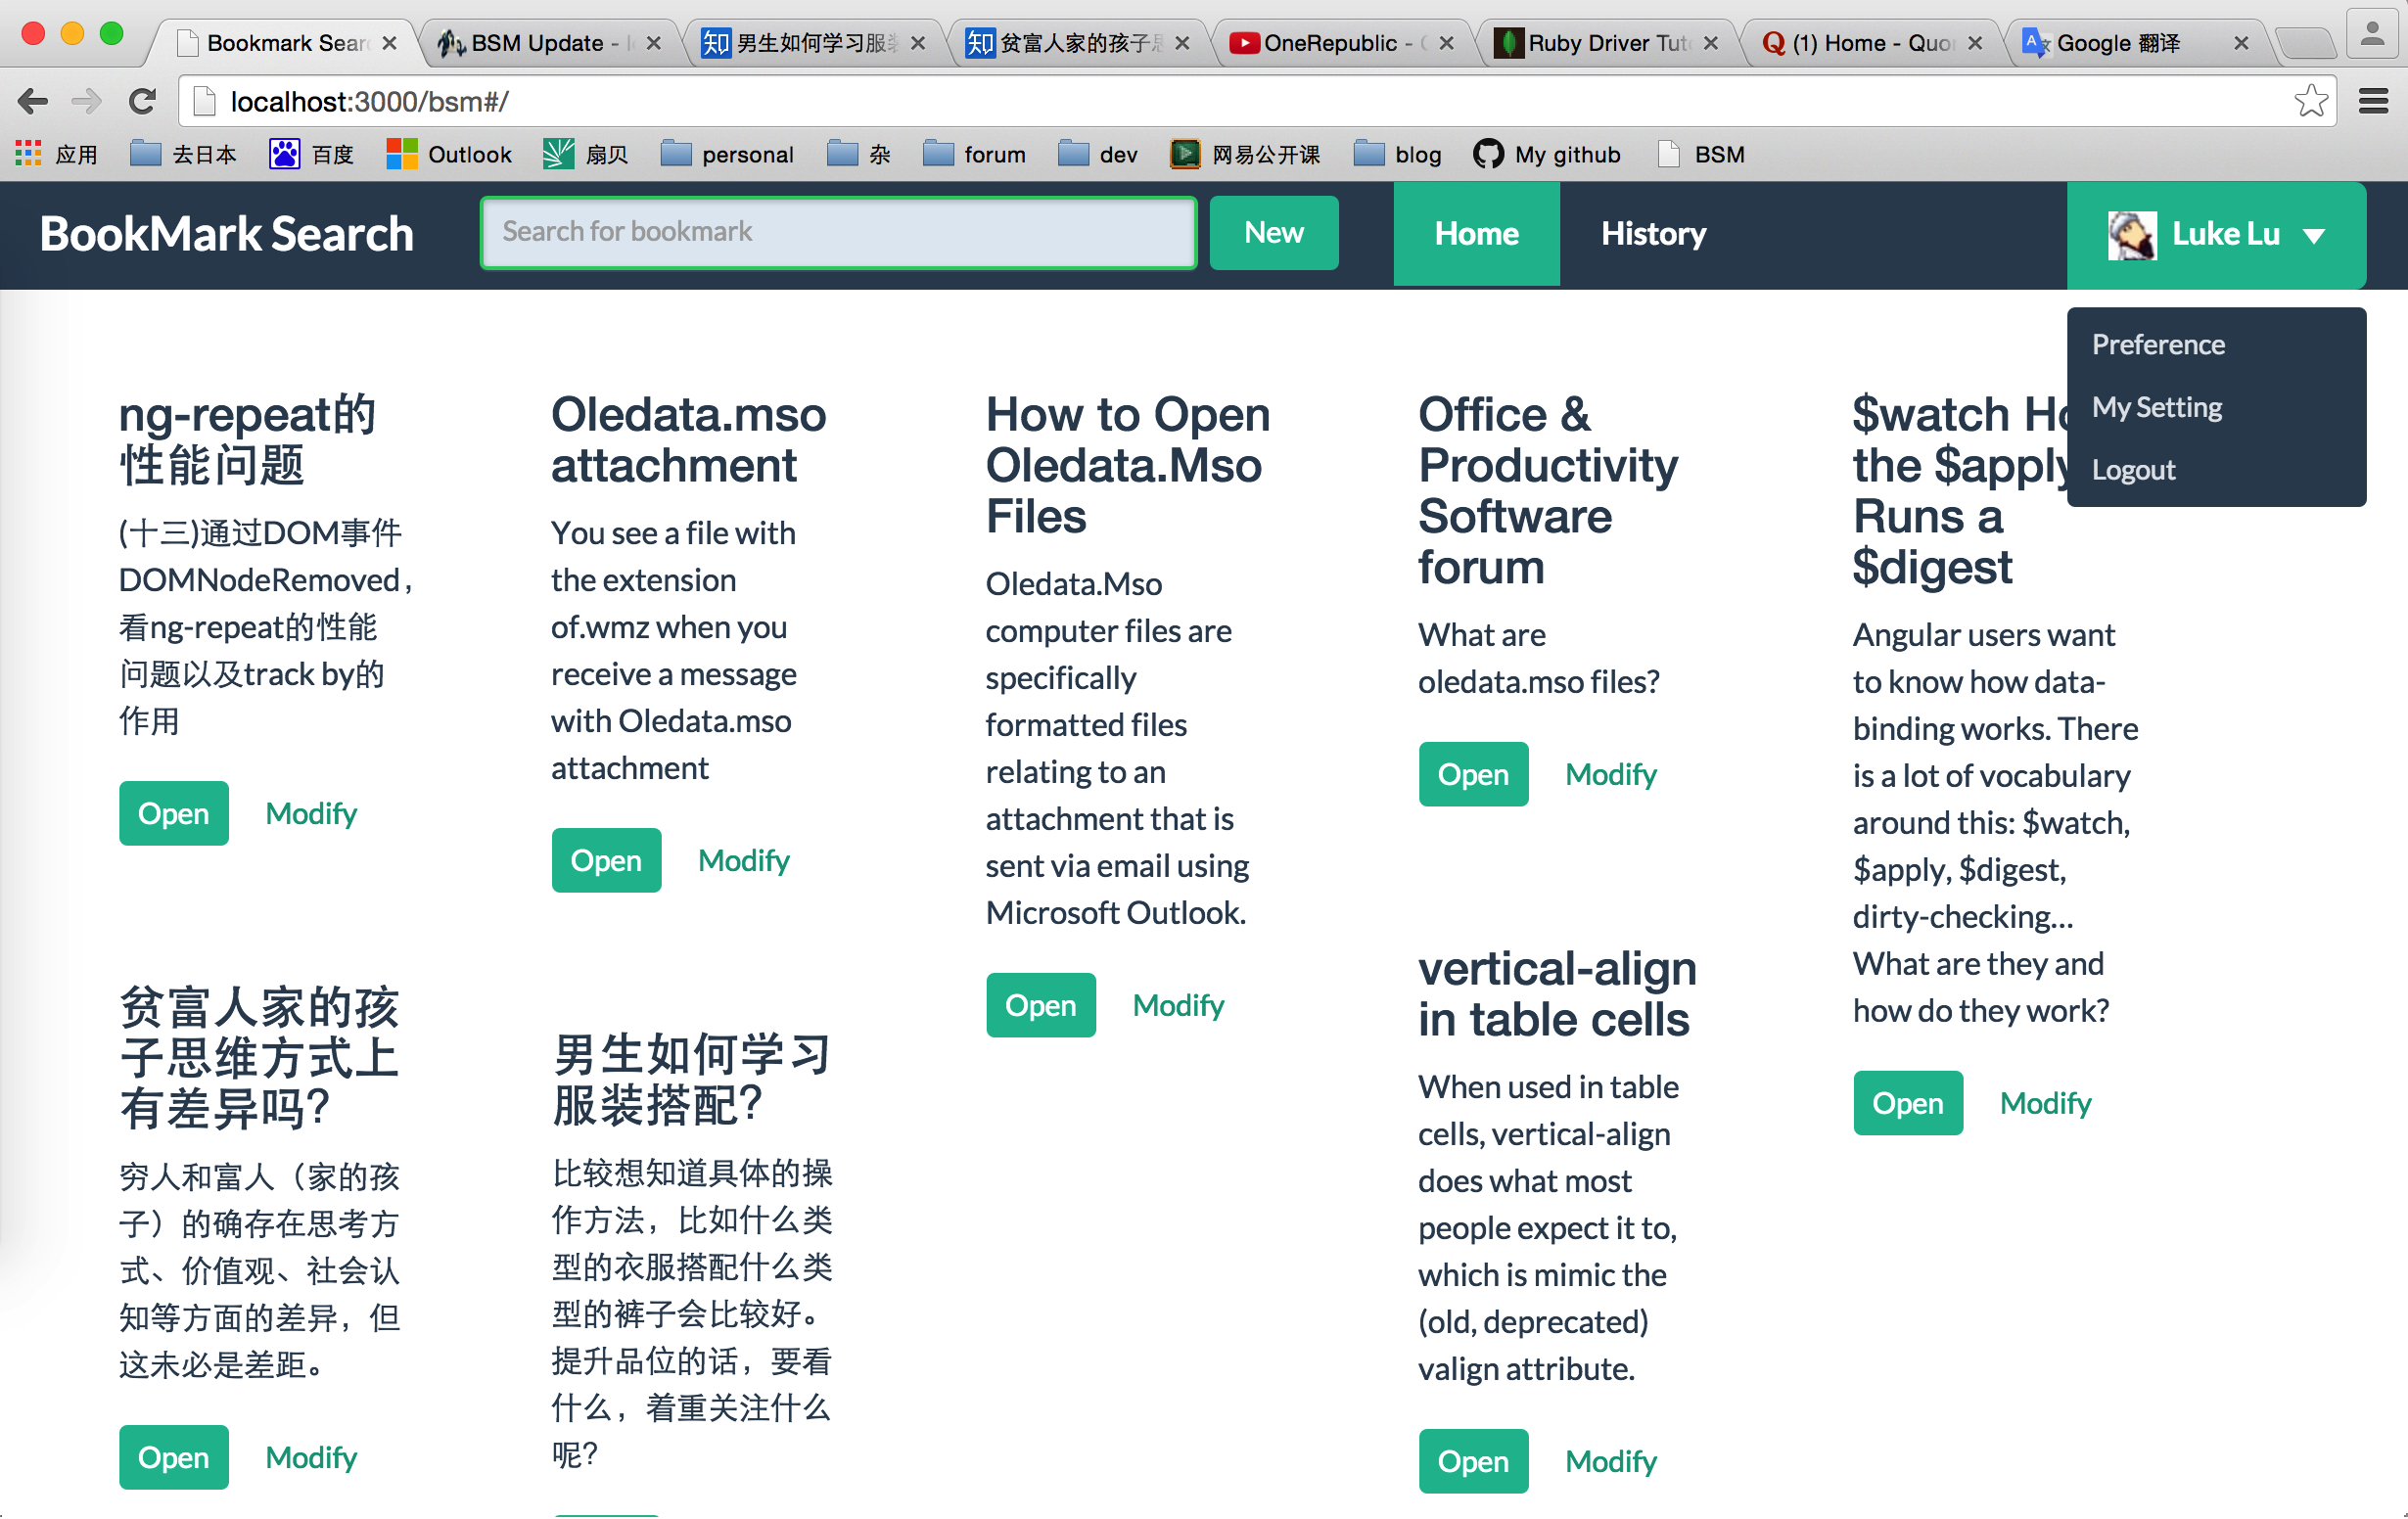
Now, let me introduce how I implement the login mechanism in BSM project.
Authentication
The essence of authentication is to confirm whether the user is qualified. With some investigation, I conclude all the scenarios into three approaches:
- User starts his travel from the login page firstly.
- User try to access some resource directly without logging in first.
- User refresh the current resource but he may be not the member any more at that time.
For the first situation, we can prepare a login page so that user can have a chance to claim himself.
For the other situation, we need to check whether the session is active. If the session is empty, then we will direct the user to login page for he has not logged in yet.
Login module
There are only two things we need to do for achieving the login module, a login page and implementing the functionality behind the page.
Login page is first thing that our user will see when they try to access our product. Usually, the first sight will influence people a lot on their judgement about the thing they saw. So I try to make my login page attractive as much as possible.
In BSM I adopt flat-ui as my first choice for style sheets, here is how my login page looks like:
Also attach its implementation: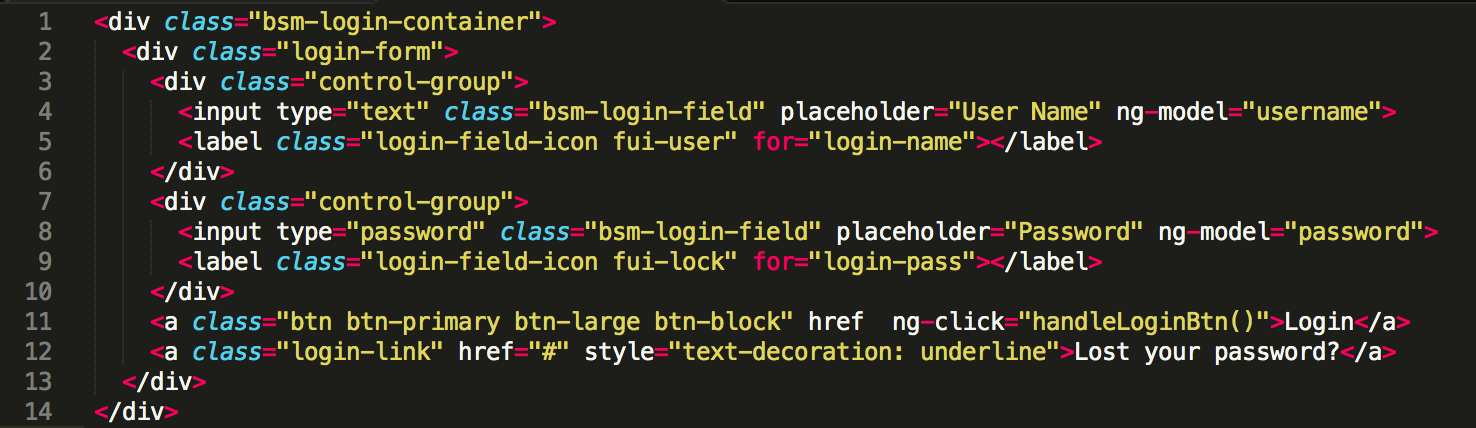
Now we need to implement remaining part step by step.
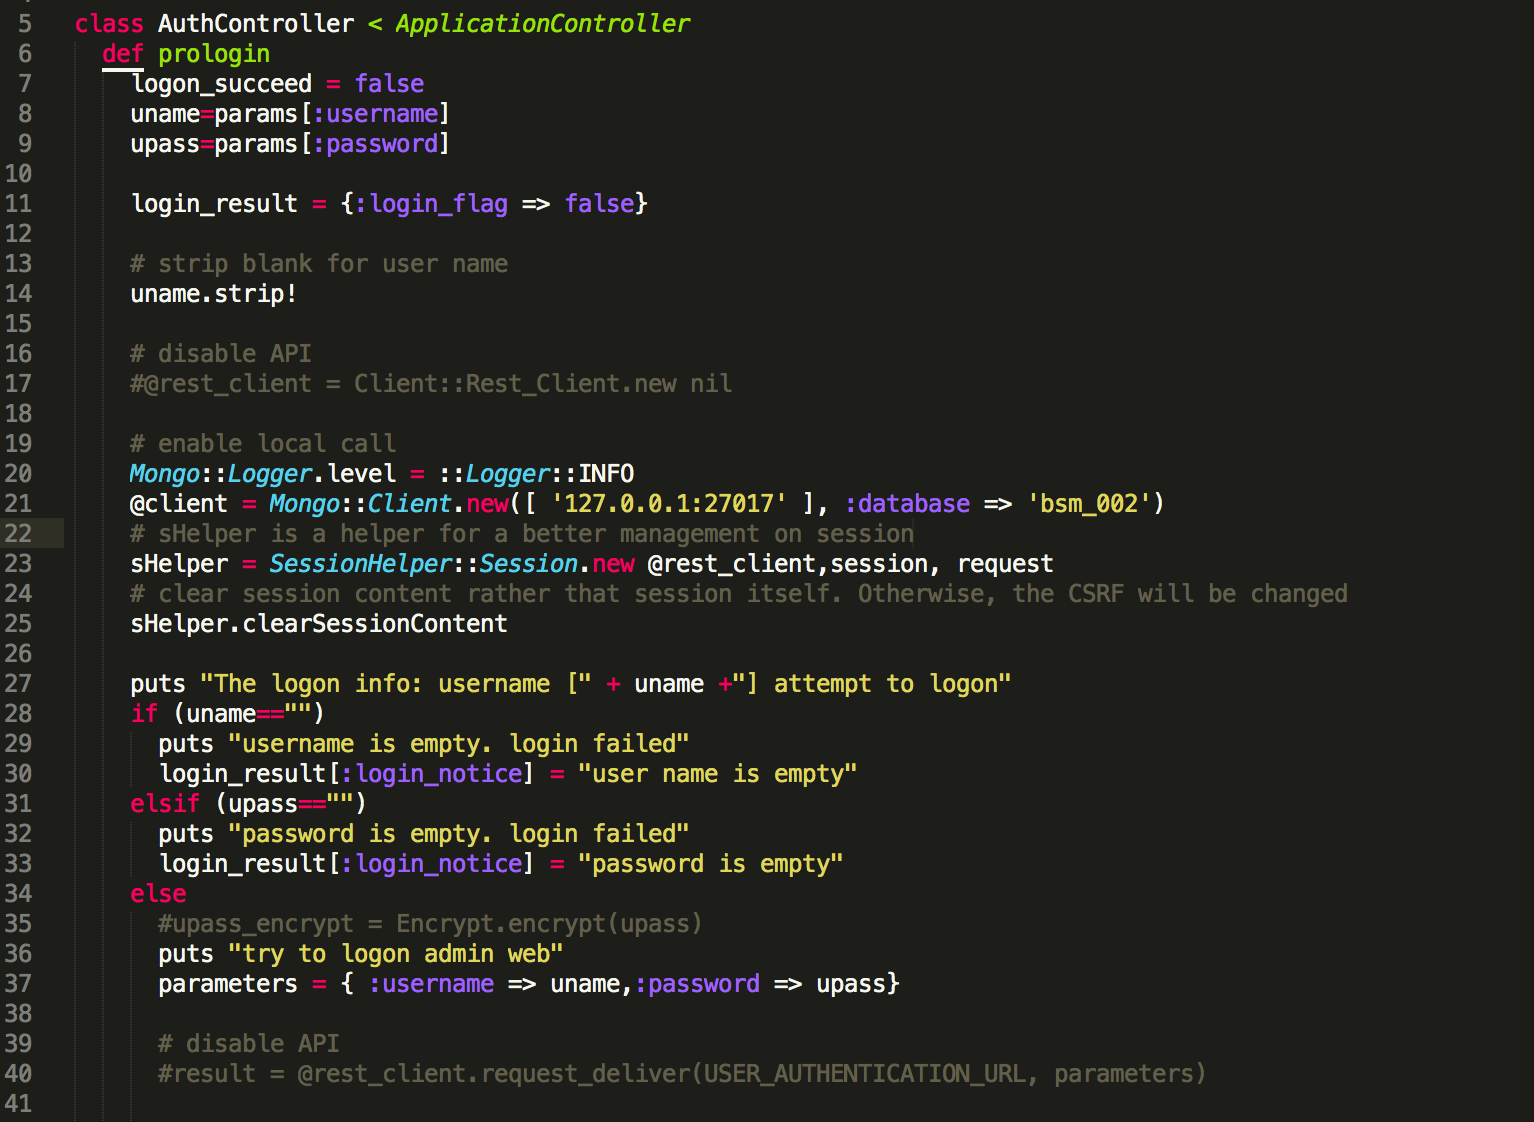
Implement authentication in the backend
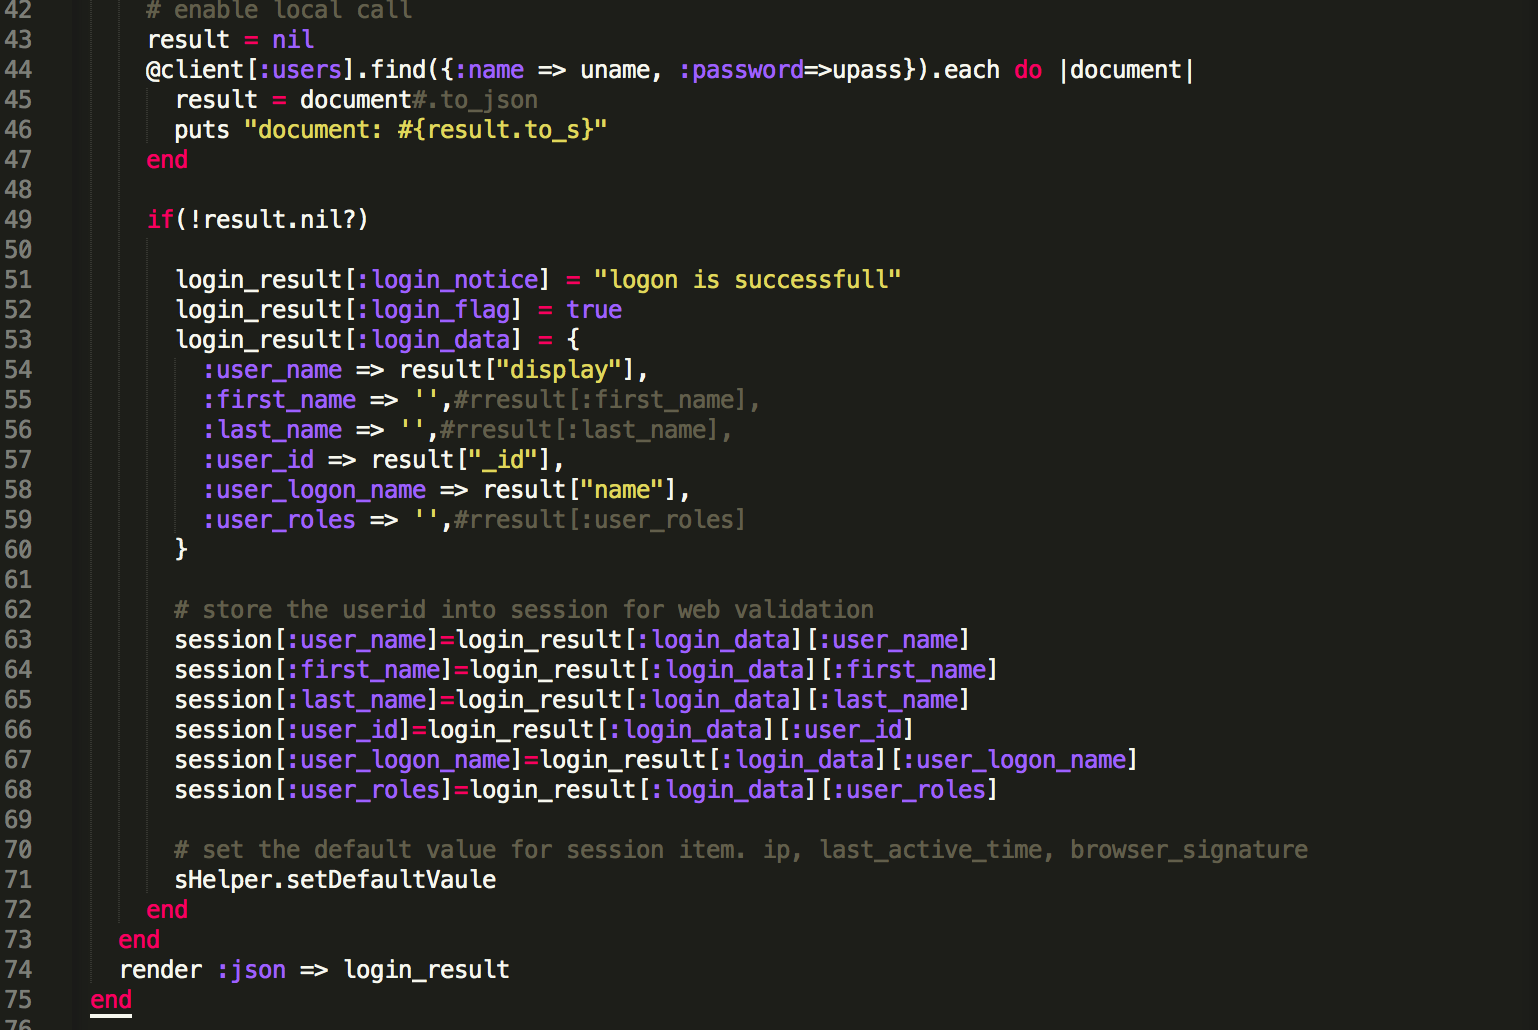
Because time is limited, I simplify the authentication by directly query the target user from mongodb’s users collection by the account the user inputs in login page. If the query result is not empty, then the user is a qualified member.
When user passes the authentication, his personal information and login information will be store into session.
Create loginService to serve for user login.
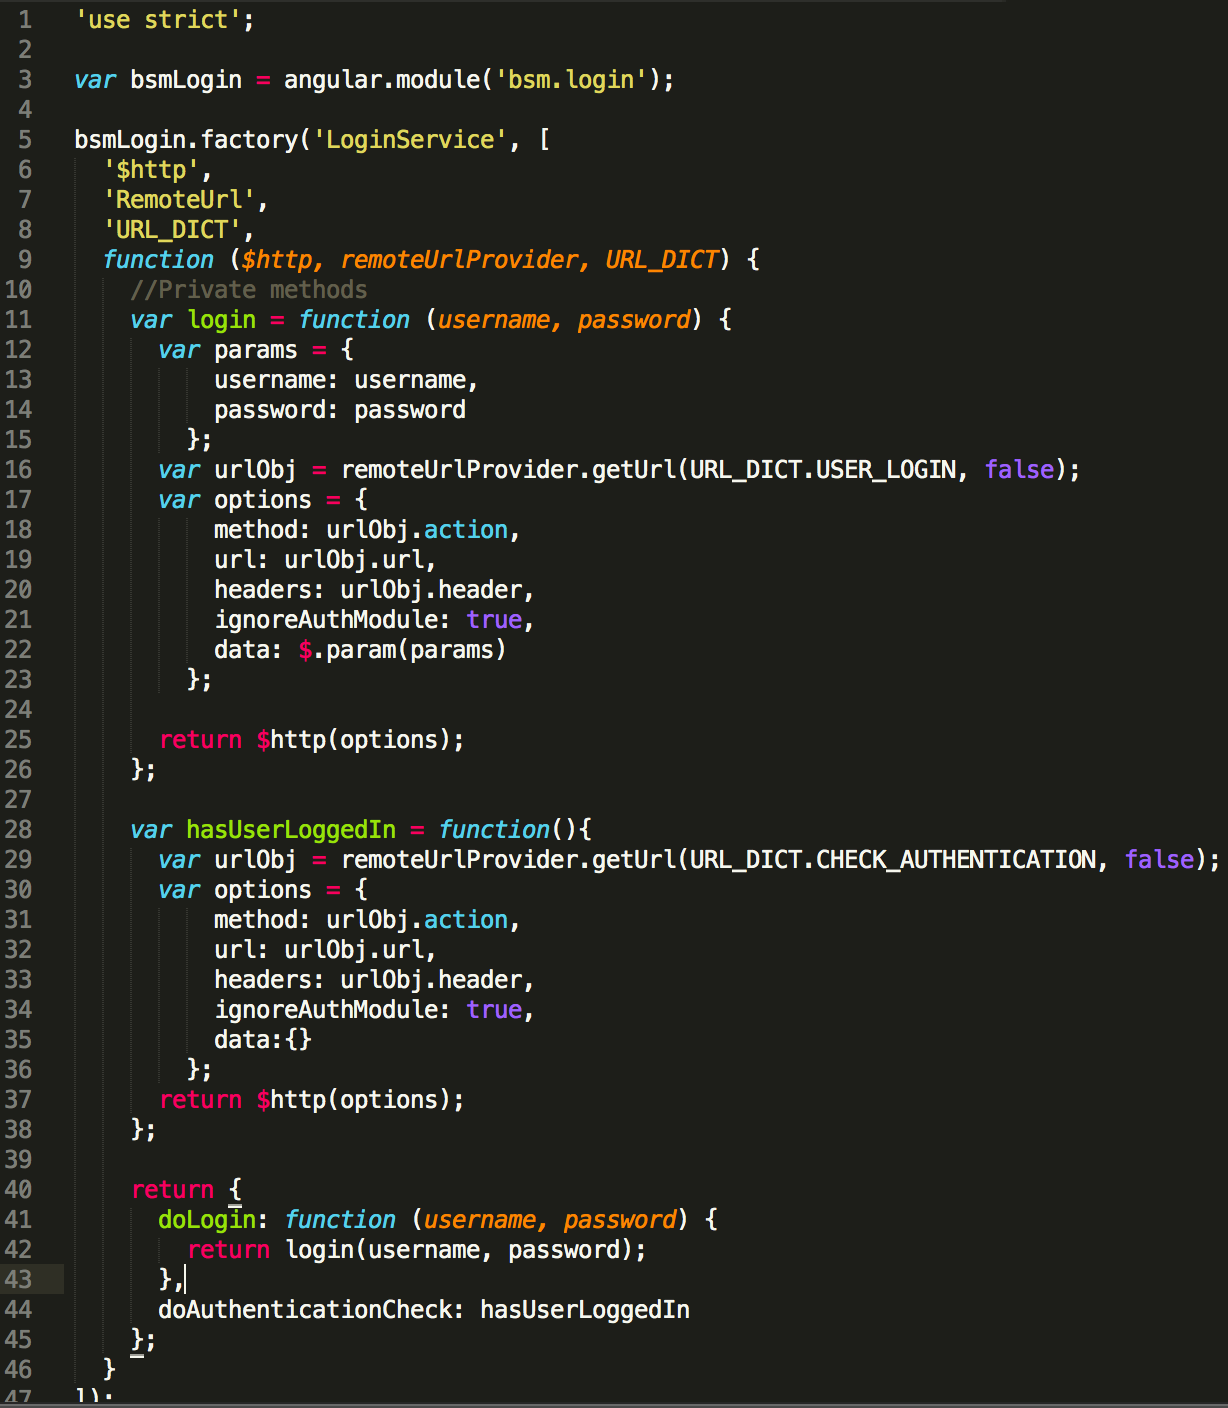
urlObjinvar login = function(username, password)points toAuthController#prologinNow all the authentication-related request will be sent by loginService.
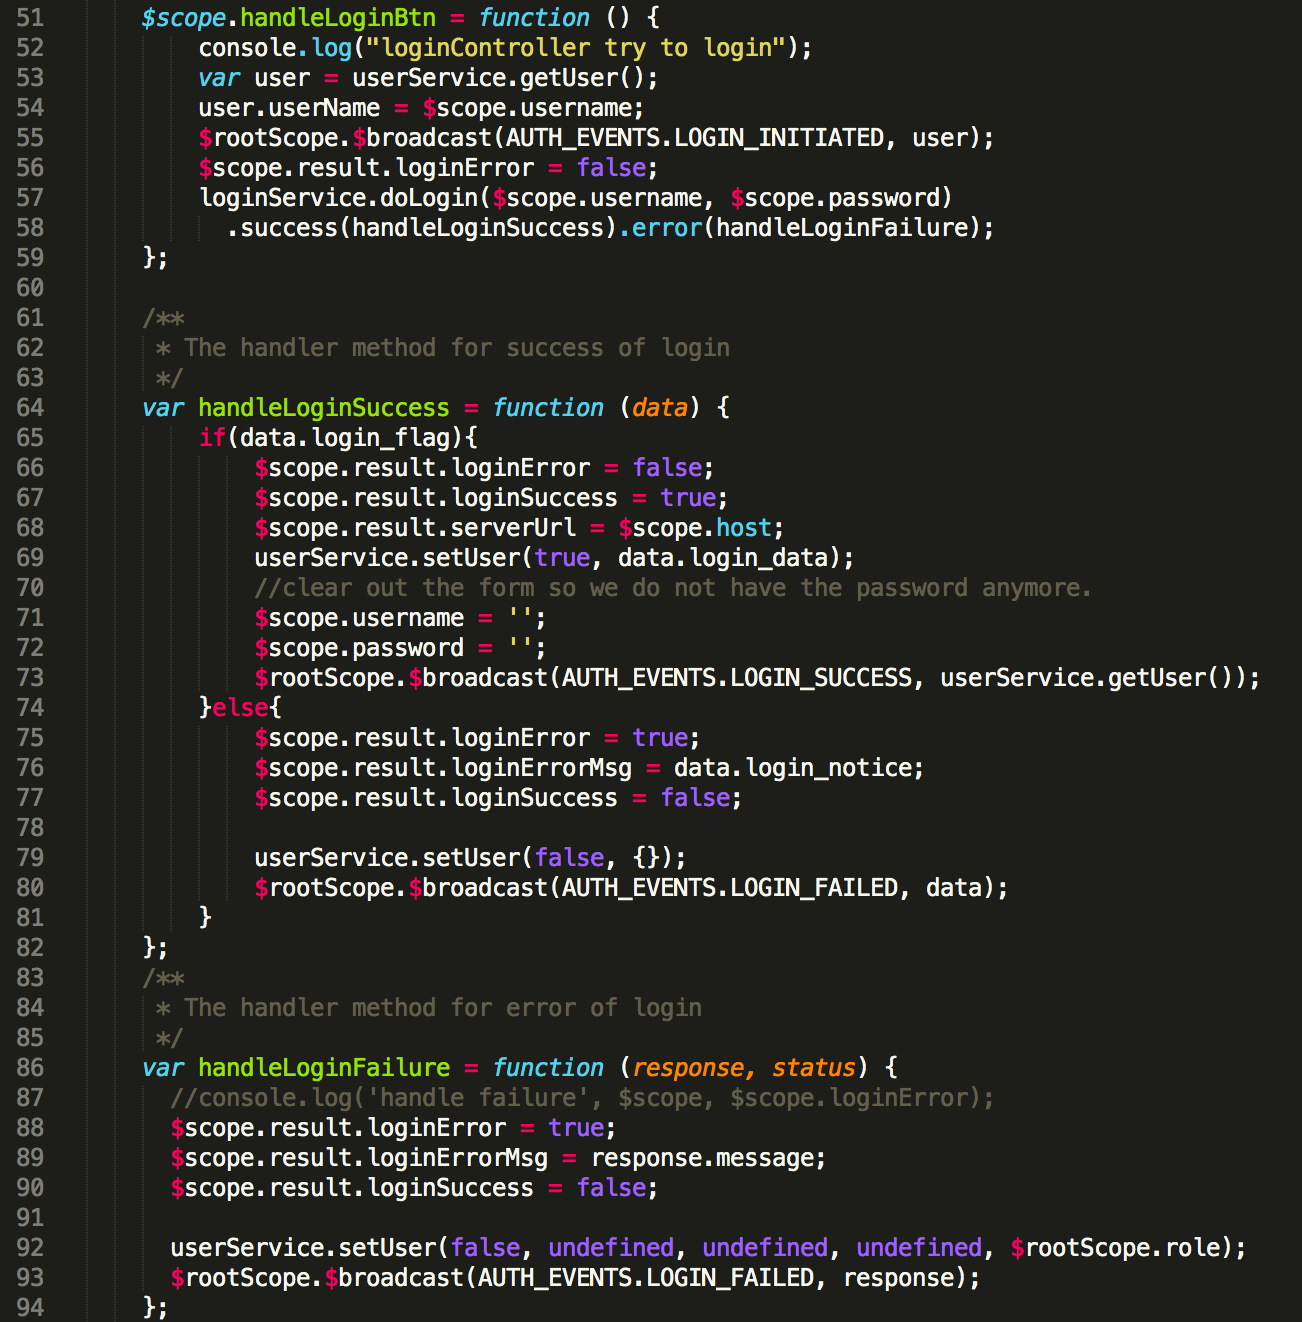
Create loginController to serve for user login
Here is loginController’s core code:
When user click the ‘sign in’ button on the login page,
handleLoginBtnin loginController will be triggered. It will ask the loginService to send a login request to authenticate when user account is correct.If user logs in successfully, the callback function
handleLoginSuccesswill take out user’s profile from the request and store them in the userService which is designed for setting and getting all kinds of user’s information, including profile, preference, permissions, environment(timezone .etc). At last,handleLoginSuccesswill broadcastAUTH_EVENTS.LOGIN_SUCCESSto inform other module that authentication has passed.
Connect the loginController with login page
Authorization
Authorization in js side contains at least two layers of meaning, whether user is qualifed and whether qualified user has the permission to the resource he is asking for.
So for each request, we will check whether he has logged in or not. If not, user will be redirected to login page. For any qualifed user, we need to check whether he has the corresponding permission. If not, redirect him to login page.
Here is the design for the workflow:
If user wants to visit login/register page, then simply open the resource for him.
If user wants to visit other resource, then check whether he has logged in.
- If not, then redirect him to login page
- If user has logged in, then check his permission
But the final implementation is a little different from the original design:
If user wants to visit login/register page, then simply open the resource for him.
If user wants to visit other resource, then check whether userService is empty and session is active. When user logged in, the userService will be filled with user’s profile which means if userService is not empty, user must have logged in. When user logged in, the session will be filled with some identity which means if session is still active, user must have logged in. The difference between userService and Session is the former is in JS side and the latter is in Server side. So we will check the former before ask for the session.
- If userService is not empty, then check user’s permission to decide which page will be directed? login page or other resource?
- If userService is empty, then check user’s session. If it is active, then check user’s permission.
- If userService is empty, so is session, then simply redirect the user to login page
When user logged in then refresh the page or open a new tag, then userService is empty while the session is still active
- If user has logged in, then check whether he has the permission to access the resource
- If permission deny, then simply redirect the user to login page
- If permission allow but userService is empty, then retrieve user’s profile back to userService and return the resource to user.
- If permission allow and userService is not empty, then return the resource to user.
In order to intercept each request, I listen for RouteChangeStart event. In this event, I will check whether userService is empty before any request go further.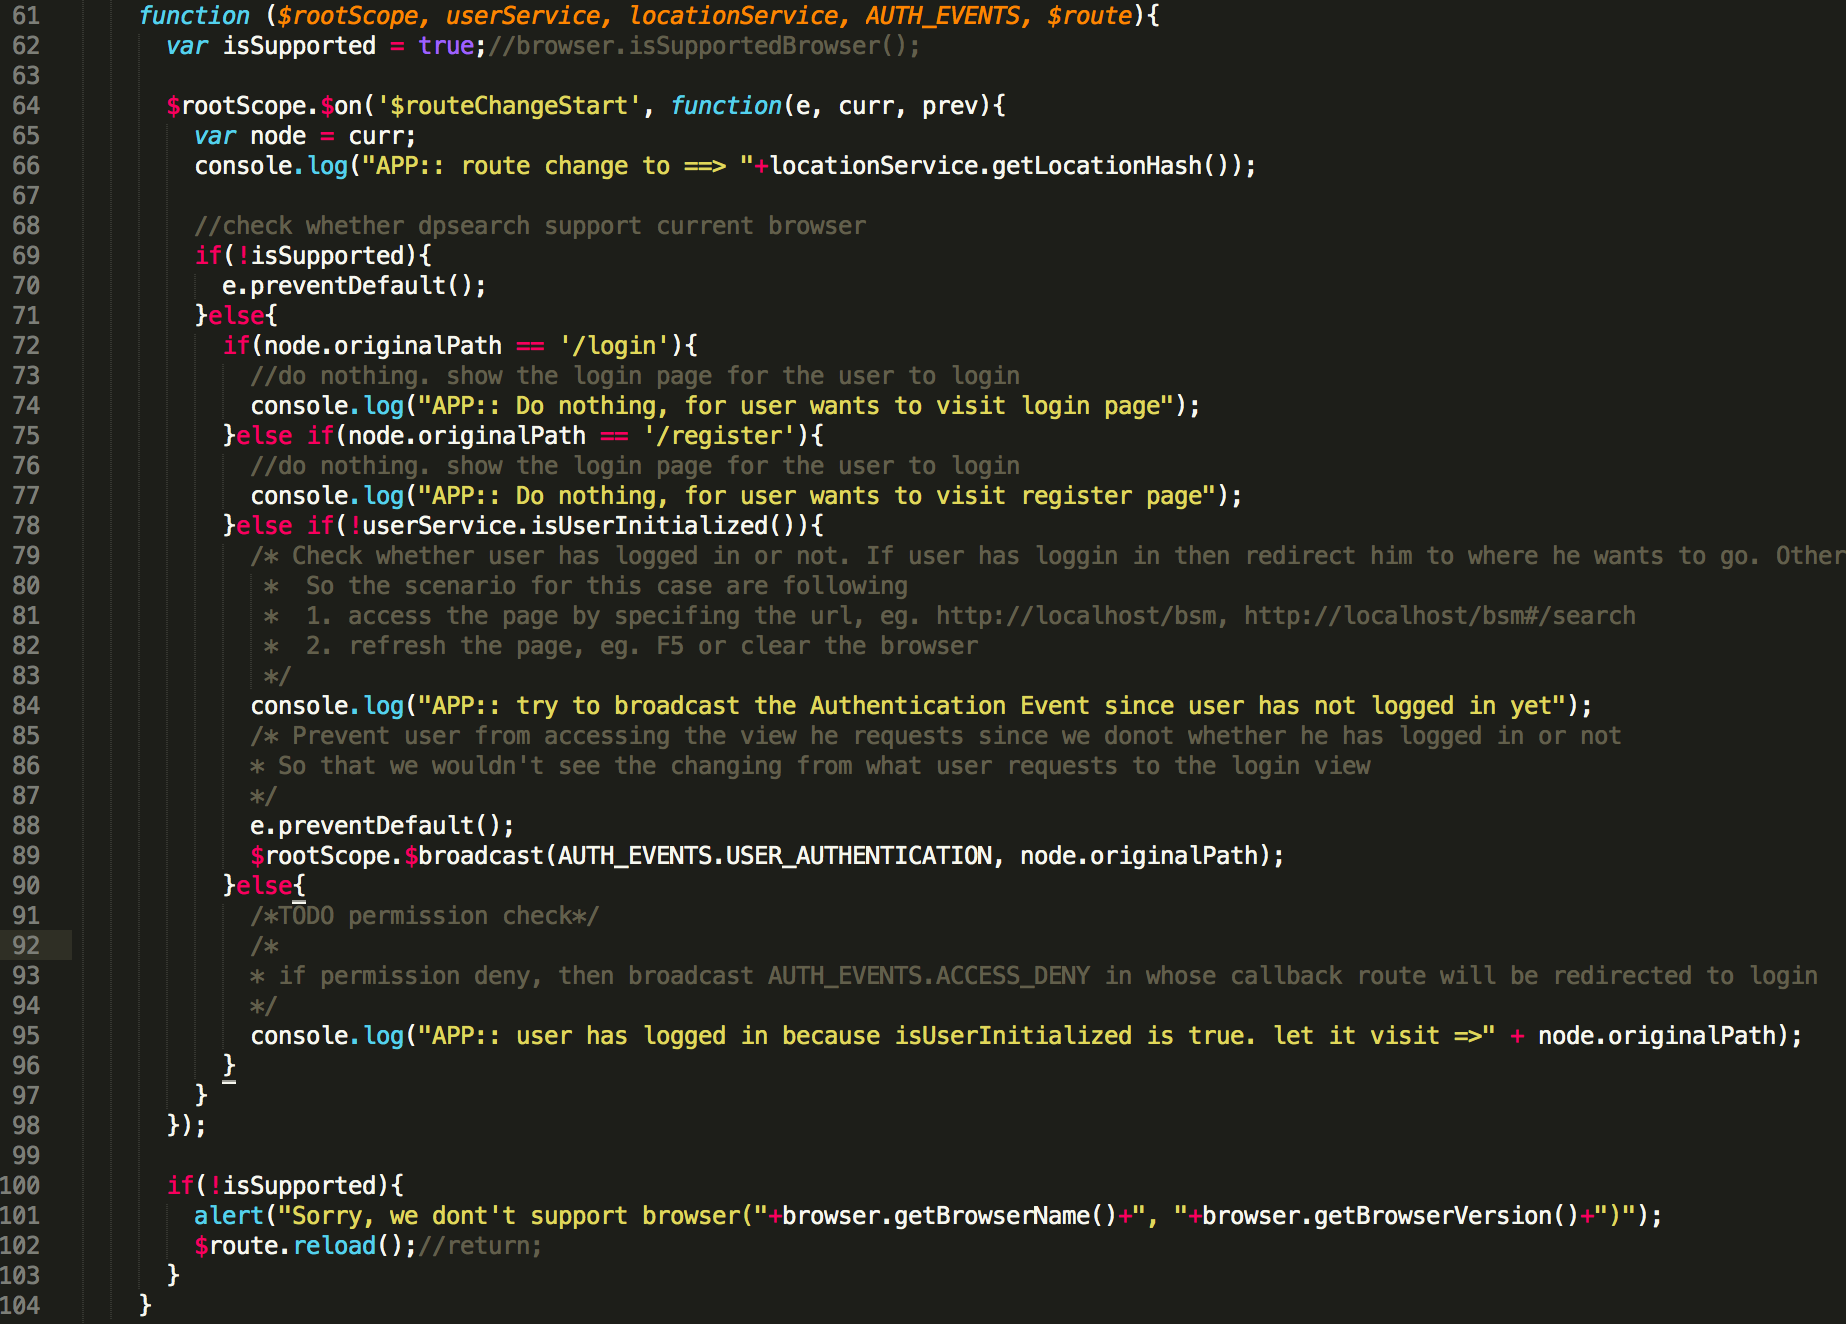
If userService is empty, then event AUTH_EVENTS.USER_AUTHENTICATION will be broadcasted which will sent an request to backend to check whether the session is active and return user’s profile if session is proved still active.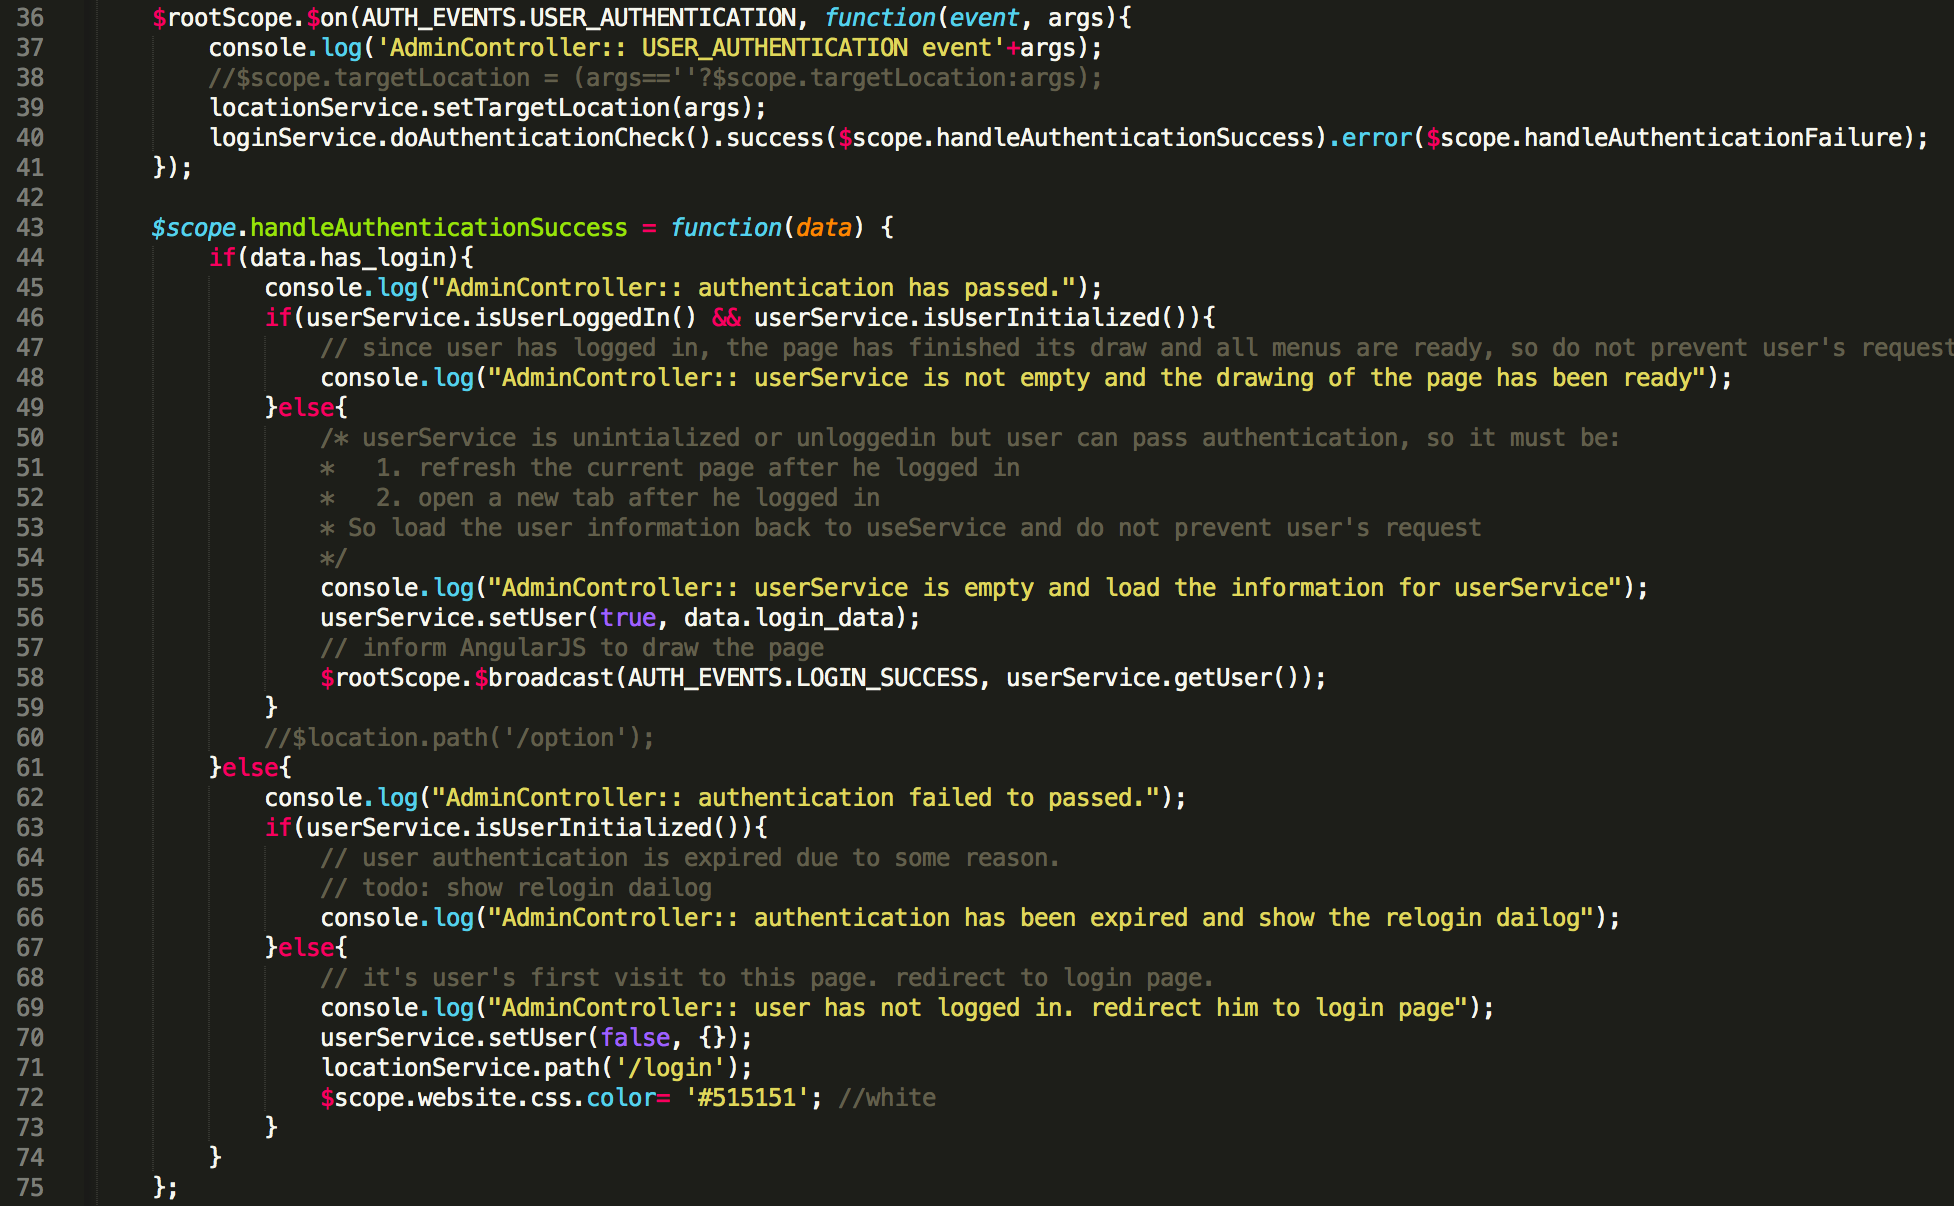
If everything goes well, then the user’s profile will be set into userService and event AUTH_EVENTS.LOGIN_SUCCESS will be broadcasted.
User information and User preference
Use userService to intialize the welcome page for more user friendly. More detail please see annotation.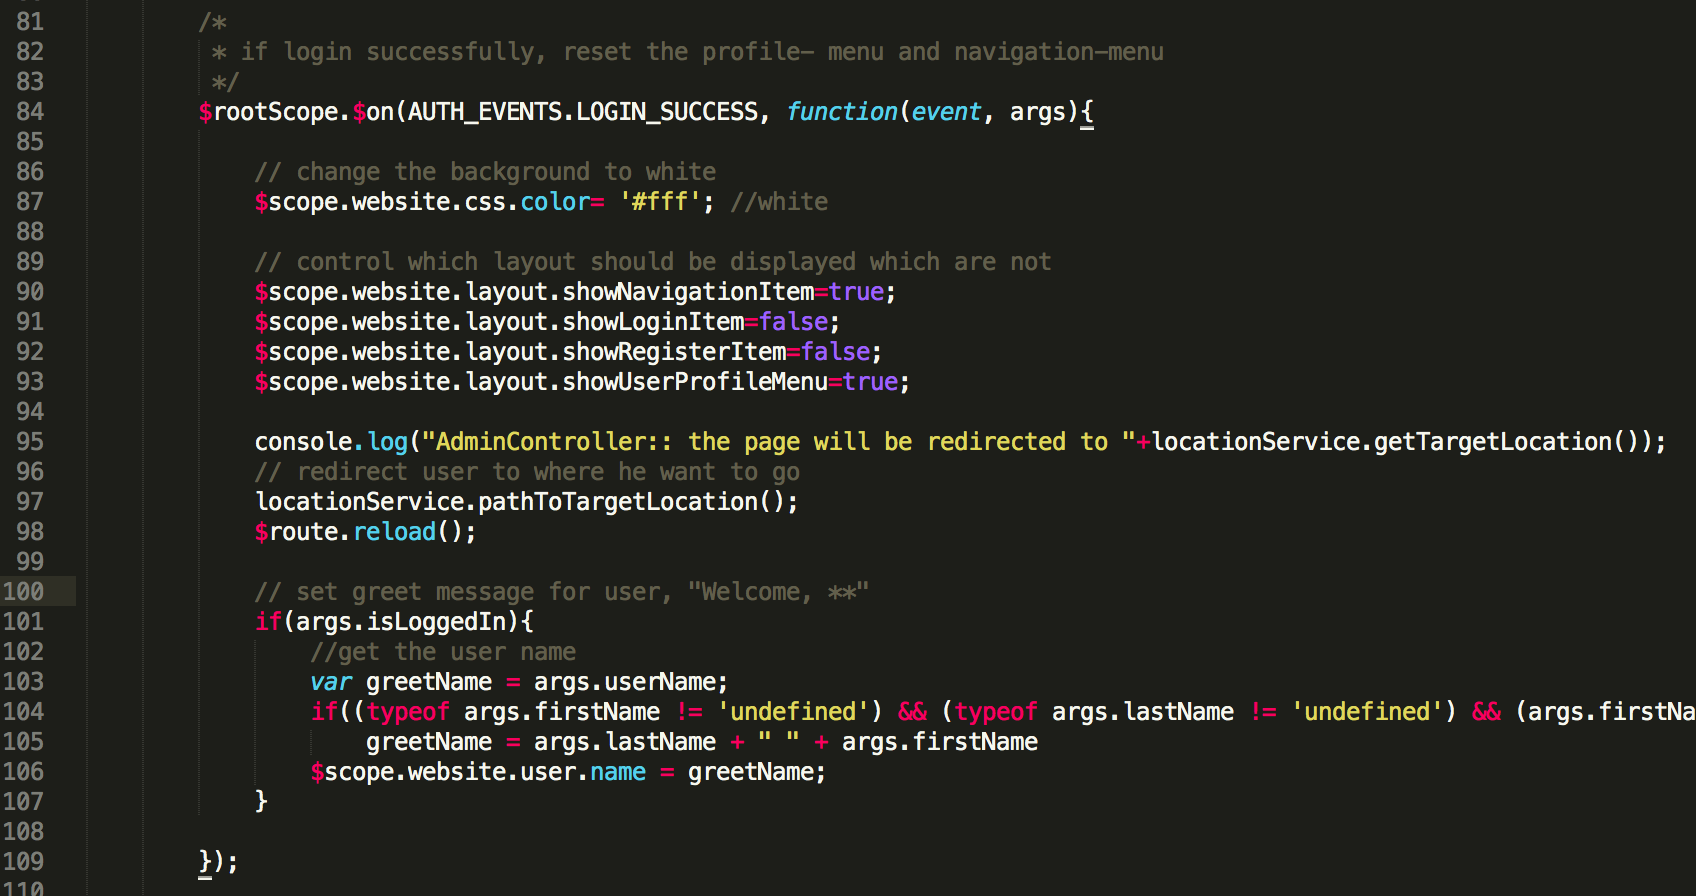
Route Control
Before authentication/authorization, we need to write down where user wants to go so that we can redirect him to his destination.
When routeChangeStart broadcasts event AUTH_EVENTS.USER_AUTHENTICATION, the original path will be sent along with the event. So I store it into LocationService.
If authentication/authorization failed, then user will be simply redirected to login page.
If not, locationService.pathToTargetLocation();$route.reload(); will redirect the user to his destination.
Session timeout
Backend will check whether session has been timed out, whether session is from the same IP, whether session is from the same browser, etc, for each request.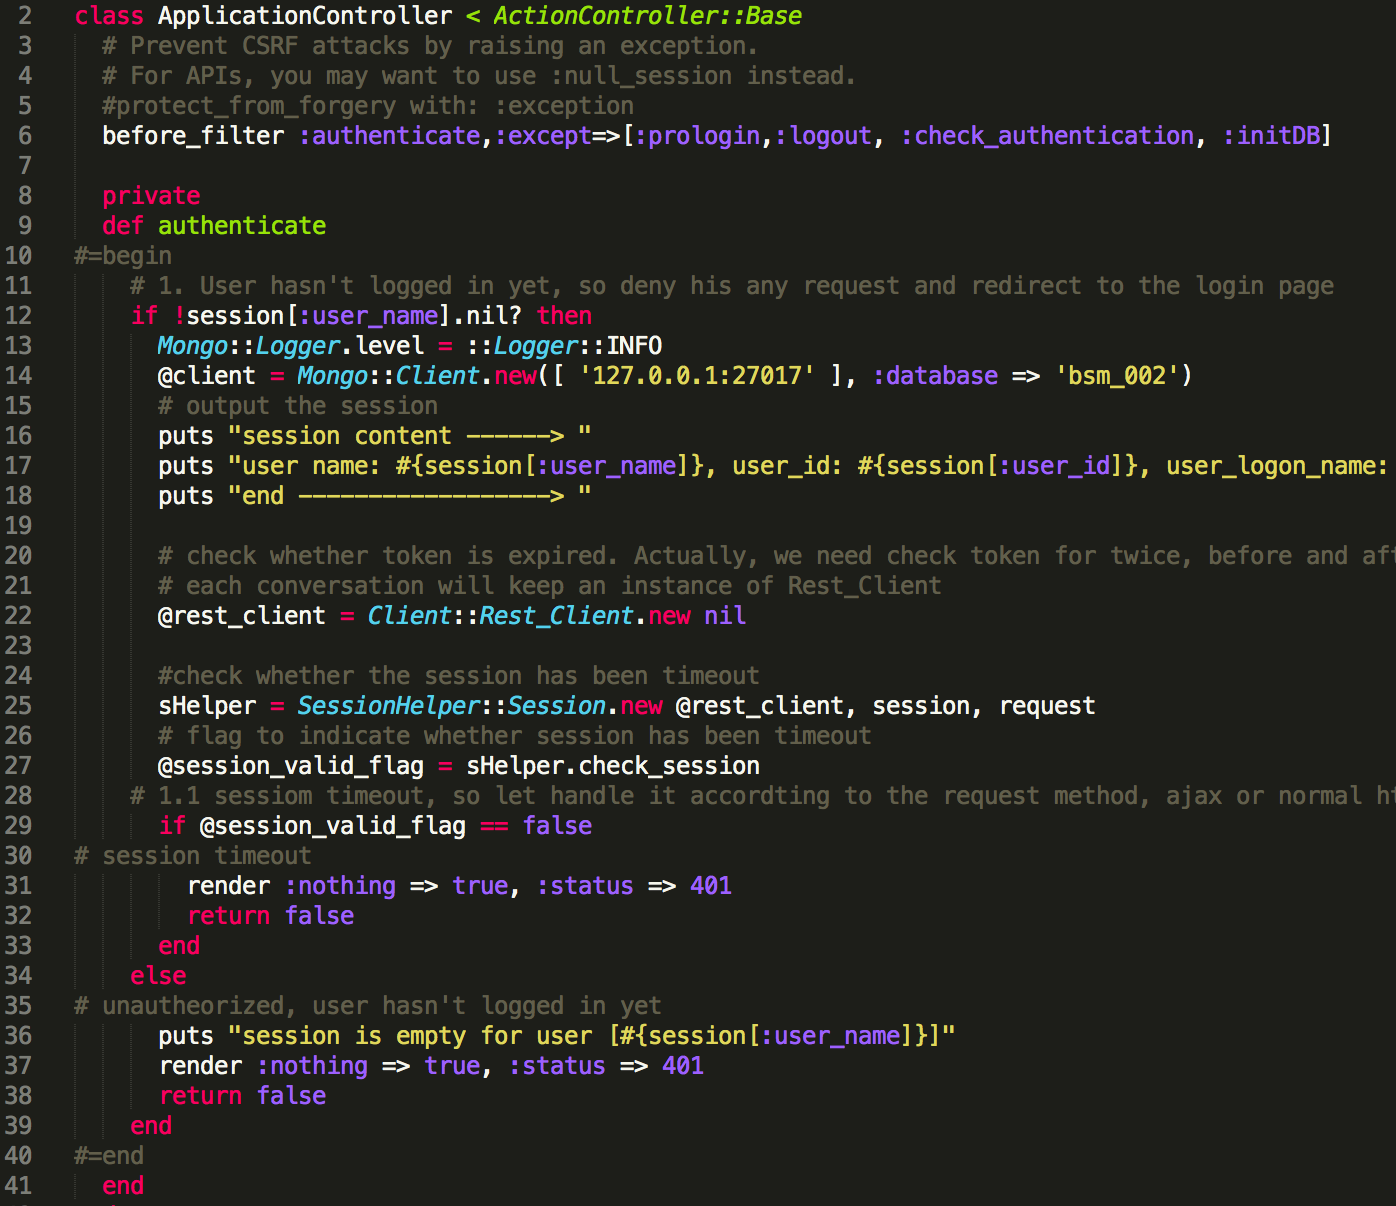
If session is proved invalid, then response with 401 will be return, then an relogin dialog will be prompt to ask user to log in again to activate his session.
Finally, you will see the welcome page.
